
10 Tips for Taking Photos of Misty Mountain Landscapes in Flores

Labuan Bajo Productions Editorial Desk
September 21, 2026
12 min read
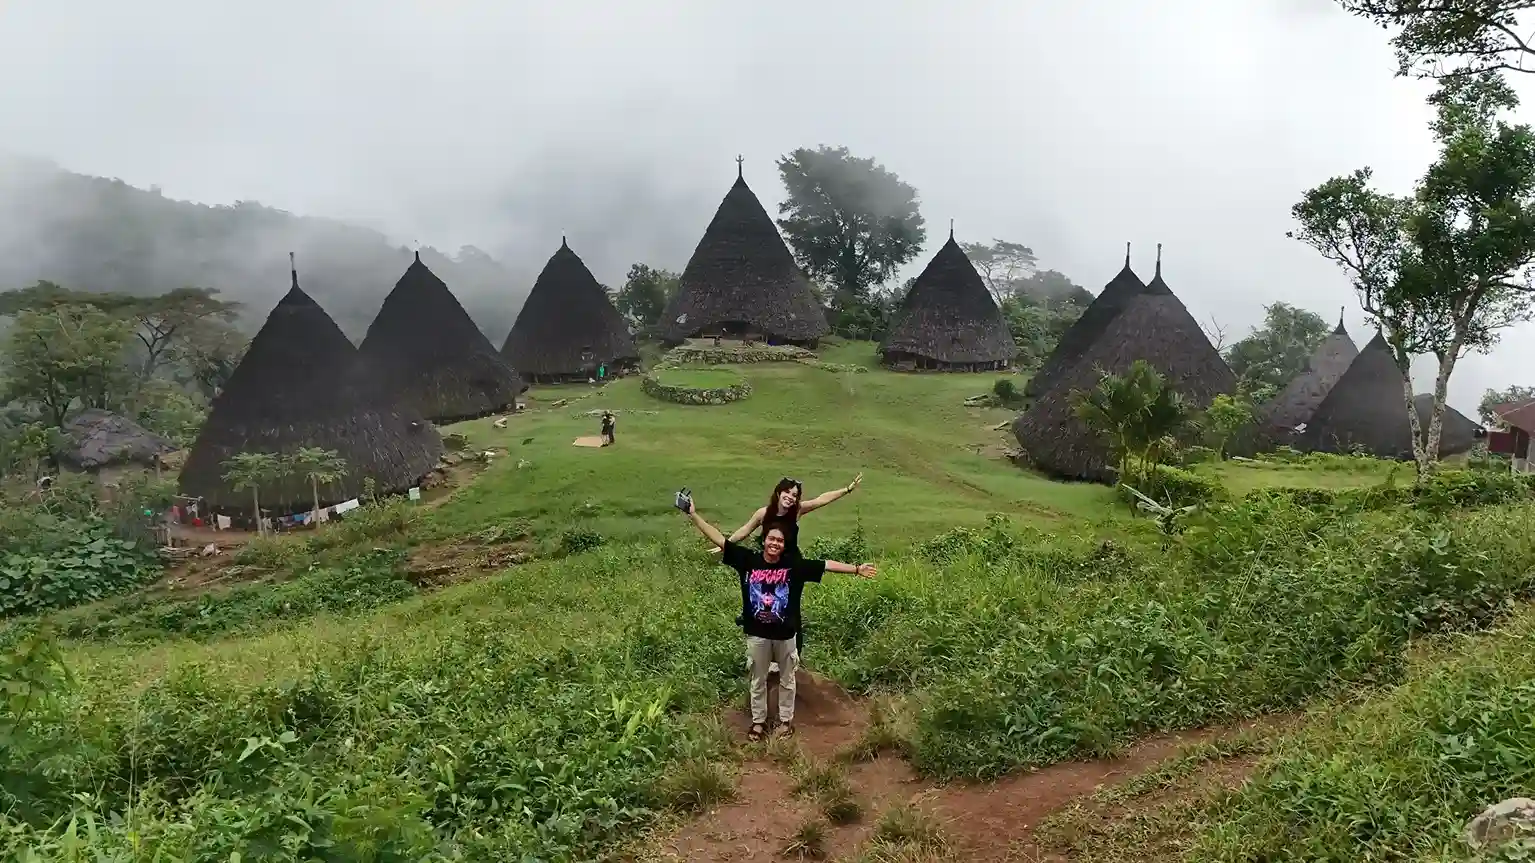
Mist is one of the elements you will often encounter when exploring the highlands of Flores. In Wae Rebo, Ruteng, Bajawa, and the areas around Kelimutu, changes in weather and elevation can cause mountain landscapes to suddenly become covered in mist. This can make landscape photography in Flores slightly more challenging, but at the same time, it gives your photos a different character.
So, how can you capture mountain photos that still retain enough detail when part of the landscape is covered in mist? This article covers tips for taking photos of misty mountain landscapes in Flores, from photographing foggy scenery to using mist as part of your travel story. If you are planning a trip to Flores and want to come home with more intentional and well-composed photos, this guide can be a useful reference before you start shooting.
Key Takeaways
- Mist can become part of your photo story rather than simply being a weather condition that blocks the view.
- Choose moments when the mist starts moving so you can capture changing landscapes from the same location.
- Use surrounding elements such as hills, roads, trees, houses, or people to give your misty landscape photos in Flores more context.
- Adjust your exposure, focus, and lens according to the misty conditions so your photos retain detail without losing their natural atmosphere.
- If you want more freedom to enjoy your trip, consider using a professional photography and documentation service in Flores so you do not have to keep holding your camera throughout the journey.
Why Are the Misty Mountains of Flores Interesting to Photograph?
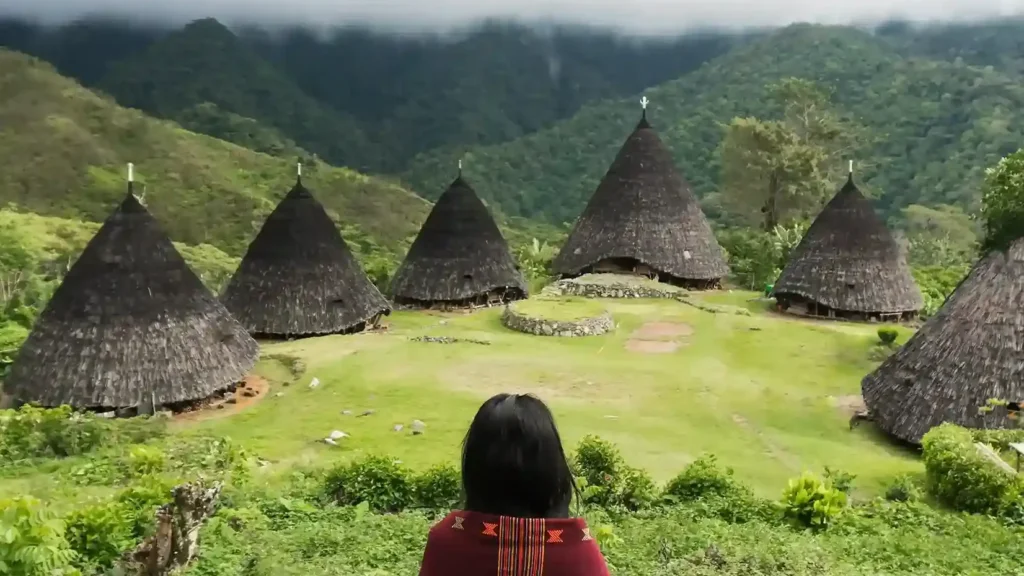
The misty mountains of Flores are interesting to photograph because they can make the landscape appear more layered and create a different atmosphere compared to clear weather. Hills, trees, roads, and buildings around you can appear with varying levels of clarity when parts of the landscape are covered in mist. This can actually help create more storytelling-focused foggy landscape photography, because the photo does not simply show a view but also captures the atmosphere of the Flores highlands as you experience it in person.
In addition, mist in Flores can change within a short period of time. A landscape that is initially hidden may slowly become visible as the mist moves, only to become hazy again a few moments later. These changes give you the opportunity to capture Flores landscape photos with different moods without having to move to another location. So, if your trip happens to coincide with misty weather, there is no need to immediately consider it a condition that makes the scenery less appealing. Instead, mist can become part of the travel moment that makes your photos feel more connected to the atmosphere you experienced in the mountains of Flores.
Tips for Taking Photos of Misty Mountain Landscapes in Flores
To capture clear and natural-looking photos of misty mountain landscapes in Flores, you need to adjust your photography approach to the changing conditions in the highlands. Here are several tips you can try so that the mist becomes part of your photos rather than simply blocking the scenery.
1. Choose the Right Moment When the Mist Starts Moving
Choosing a moment when the mist starts moving can help you capture more varied views of the misty mountains. In areas such as Wae Rebo, morning mist can change quite quickly, so do not immediately assume that the scenery is not worth photographing when your first view is still covered.
Once you have reached an area with the view you want, give yourself a few minutes to observe the surroundings. As the mist begins to thin, the contours of the hills or trees in the distance may gradually start to appear. These transitional moments often give you more photographic options than when the entire landscape is covered in mist. For this reason, have your camera ready before the mist begins to clear. Take several frames as the scenery changes so you are not relying on a single moment.
2. Find an Angle Where the View Is Not Completely Covered by Mist
When photographing misty scenery in Flores, look for an angle where part of the landscape remains clearly visible so the photo is not dominated by mist. This can be particularly useful when you are in an area such as Kelimutu, where mist can make parts of the crater lakes or surrounding hills appear hazy.
Instead of continuing to face the area with the thickest mist, try shifting your position by a few steps and observe how the frame changes. From a certain position, the mist may only cover the background while the foreground subject remains clearly visible.
You can try:
- Placing trees or vegetation in the foreground.
- Using a visible hill as the main subject.
- Pointing your camera toward a gap as the mist begins to clear.
- Taking a frame when part of the landscape is visible while another part is still covered in mist.
This approach allows the misty conditions to remain a strong part of the image without making you lose the context of the place you are visiting.
3. Include Distinctive Elements of the Flores Landscape in Your Frame
Including distinctive elements of the Flores environment can make your Flores travel photos feel more personal rather than looking like simple mountain photographs. When you are in Wae Rebo, for example, traditional houses and the surrounding village can become important elements in the frame when the hills behind them are covered in mist. You do not need to include too many subjects at once. Choose one or two elements that are already around you, then let the mist become their background.
For example, you could photograph someone walking with a traditional house and hazy hills in the background. This type of composition provides context that the photo is part of a journey in Flores rather than simply a photograph of a particular weather condition. The same approach can be applied when you come across roads, farmland, trees, or local activities in other highland areas. Let the natural surroundings become part of the story in your photo.
4. Use Layers of Hills to Create Depth
Using layers of hills is one way to make misty landscape photography in Flores feel more three-dimensional. This can be particularly interesting in the hills of Ruteng and Manggarai, where the contours of the landscape can appear layered when mist settles between the hills. Look at the scenery from the foreground to the distance. You may find plants or trees that are clearly visible in front, followed by slightly hazier hills in the middle, and hills that almost disappear behind the mist.
There is no need to try to make every part of the image equally clear. In fact, these differences are what show distance and give the photo its character. If the mist suddenly covers the furthest hill, do not immediately change locations. Wait for a while and see whether part of the landscape begins to appear again. Changes like this can produce several versions of a photo from the same viewpoint.
5. Use Roads or Travel Paths as Leading Lines
Roads and trekking paths can become important elements in travel photography in Flores, especially when they lead toward an area covered in mist. Instead of photographing only the scenery from the final viewpoint, use the journey toward the destination as part of the photograph. For example, while passing through the highlands around Bajawa, you may come across a winding road between the hills. If the end of the road disappears into the mist, position your camera so the lines of the road lead the viewer’s attention toward that area.
You can also ask a friend or family member to walk a few steps ahead. This gives the photo a sense of travel while also showing the scale of the landscape. The interesting thing about this approach is that you do not need a completely open view. Even when most of the mountains are covered in mist, a clearly visible travel path can still become a strong part of the composition.
Read more: 8 Hiking Spots in Labuan Bajo You Must Try and Capture
6. Adjust the Exposure So the Photo Does Not Look Too Dark
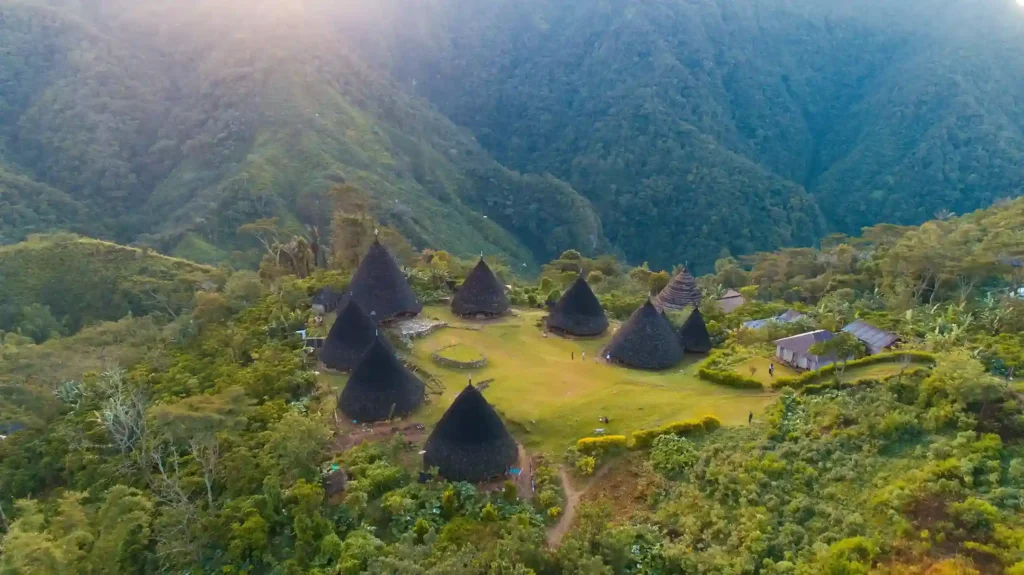
Getting the exposure right is important when photographing misty mountain landscapes in Flores because bright areas of mist can cause your camera to produce a darker image than what you see with your eyes. As a result, trees, roads, or other objects in the foreground may appear too dark. If you are using a camera, check the preview and histogram after taking several photos.
If the result looks underexposed, you can gradually increase the exposure compensation, for example from around +0.3 to +1 EV, and then check the result again. For smartphone users, the principle is simpler. Tap the area you want to prioritize, then adjust the brightness slider if the preview looks too dark. When photographing an area such as Kelimutu, for example, do not focus only on the bright sky or mist. Make sure the main subject you want to show still has enough visible detail.
7. Make Sure Your Camera Focuses on a Clear Subject
Making sure your camera focuses on a clearly defined subject can help when photographing misty landscapes in Flores, especially when the mist is quite thick. Your camera may struggle to find a focus point when almost the entire frame has similar colors and contrast.
If you are in Wae Rebo and want to photograph a traditional house with misty hills in the background, for example, place the focus point on a part of the house with clearer lines or textures. Once focus is locked, you can recompose the frame before taking the photo.
Objects you can use as a focus point include:
- Houses or buildings
- Tree trunks
- People walking
- Fences
- Rocks or road surfaces
- Vegetation close to the camera
This way, the mist can remain part of the atmosphere without making the entire photo appear out of focus.
8. Choose a Lens According to the Scenery
Choosing the right lens can help you capture more effective photos of the misty mountains of Flores because mist can make an overly wide landscape appear empty. A wide-angle lens is certainly useful for showing the landscape as a whole, but there are situations where focusing on a specific section of the scenery can produce a stronger photograph.
When you are in an area such as Ruteng, for example, you may find a series of hills partially covered in mist. If you use a wide-angle lens and include the entire area, much of the frame may be filled with sky or mist. With a longer focal length, you can isolate a particular section of a hill that remains visible through the mist.
If you are only carrying a smartphone, use the ultrawide camera when you want to show a wider landscape and the main camera when you want to isolate a particular section. Try both before moving to another location because changing mist conditions can cause the strongest composition to change within a short period of time.
9. Do Not Over-Edit Misty Photos
Editing misty photos should preserve the soft character of the Flores mountain landscape rather than removing the mist simply to make every detail look sharp. This is important because the mist is part of the actual conditions that make the photograph different from a landscape photographed on a clear day.
After taking the photo, you can make simple adjustments such as:
- Increasing the exposure if the photo is too dark.
- Adjusting the white balance so the colors remain natural.
- Adding a small amount of contrast to the main subject.
- Adjusting the shadows to bring back detail.
- Using a moderate amount of dehaze if the photo looks too flat.
Avoid increasing clarity, contrast, or dehaze too much simply to make the hills look clearer. The result can make the transitions between the mist and the landscape look harsh and change the atmosphere you experienced directly at the location. For Flores travel documentation, a natural-looking result is also more likely to represent the actual conditions you experienced there.
Read more: Types of Photography You Must Know to Capture Special Moments
10. Use a Professional Local Photography and Documentation Service
Using a professional local photography and documentation service can help you document your Flores trip without having to stay busy taking photos throughout the journey. You can enjoy the trip more freely while a photographer helps capture misty mountain scenery, the journey to different destinations, and candid moments with friends or family. A local team is also more familiar with the character of traveling in Flores, so the documentation does not have to focus only on the main attractions but can also capture moments that happen throughout the journey.
Labuan Bajo Productions, for example, provides photo and video documentation services for travelers who want to document their trips in Labuan Bajo and Flores. With the help of a documentation team, you can continue enjoying the mountain atmosphere and the changing mist in front of you while also bringing home a collection of photos and videos that captures the travel experience more completely.
Capture Your Misty Flores Journey with Labuan Bajo Productions
The mist that appears in the mountains of Flores can become part of a travel story that would be a shame to leave only in your memories. By choosing the right moment, finding the right angle, and understanding how to adjust your camera to the surrounding conditions, you can create Flores travel documentation that still feels natural and reflects the atmosphere you experienced.
If you want to enjoy your journey without constantly thinking about camera settings, Labuan Bajo Productions can help capture your trip through professional photo and video documentation services. Contact our team to discuss your documentation needs and book a trip documentation package that suits your trip in Labuan Bajo and Flores.
Related Article

10 Tips for Taking Couple Photos in Labuan Bajo Without Looking Awkward
A trip to Labuan Bajo as a couple is something
A trip to Labuan Bajo as a couple is something you will naturally want to capture, but not every couple

Golden Hour vs Blue Hour in Labuan Bajo: Which Is Better for Photography?
If you are planning a trip documentation session in Labuan
If you are planning a trip documentation session in Labuan Bajo, choosing the right time for photos is just as
Best Time to Take Photos in Labuan Bajo for Better Results
If you are planning a holiday to Labuan Bajo and
If you are planning a holiday to Labuan Bajo and want to bring home photos that truly represent your trip,